Part 1:- API using GraphQL and Node.js

This article is for people who are interested in learning to write optimized code using GraphQL with unit testing using mocha and chai.
Before we start, we need to define the functionality of our API. The application will be a simple todo app. It will create a user in a database who will be able to create, get and delete todos. If you don’t understand the code or get stuck somewhere, you can check out the code from my Github repository.
Table of Contents
About the series
This is a series of 3 articles which will help to write production grade code. I wanted to help others who might have faced same problems as me. This article can help a beginner and also to someone who has good knowledge in node.
What you will learn?
- TypeScript (if you don’t write it already).
- Using Docker for Node projects.
- Writing a GraphQL API instead of REST.
- Basics of MongoDB.
- Logging.
- Working with JWT(Json Web token).
- Writing tests and working with code coverage.
- Writing clean code and linting.
- Writing modular code.
- Basics of Promises, async and await.
- Writing production grade code.
In this Article
In this article you will be able to do the following things:-
- Setup project
- Setup docker
- Write express server and connect to mongodb
- Write tests for above setup.
Requirements
Node and npm installed for your OS. We will use node environment to work on this project.
Docker installed for your OS. Along with local working of project, you will learn little bit of docker and how to work on projects if you don’t have node and npm installed.
GraphQL-Playground for testing your API. This is an awesome tool where you will test your APIs and learn how to use this tool.
Important :- I will teach how to work with project locally and also how to work with Docker side by side. Those who want to work only with docker, I will refer to them as non npm users. Also we will try to follow TDD(test driven Development) approach.
Project Setup
Open your development folder and create a new Folder for our project and go to it or copy the following command.
mkdir graphql-todo
Now open your code editor inside that folder.
If you have npm installed for your OS run
npm init -y. It will create a package.json file like this
{
  "name": "graphql-todo",
  "version": "1.0.0",
  "description": "",
  "main": "index.js",
  "scripts": {
    "test": "echo \"Error: no test specified\" && exit 1"
  },
  "keywords": [],
  "author": "",
  "license": "ISC"
}
non npm users just create a package.json file and copy the above contents. You can edit description to anything you like.
We will be writing code in Typescript so we will need something that will compile our code fast and minify the process. So for this we will use Gulp. Run the given command below in your terminal inside the project.
npm i --quiet gulp gulp-sourcemaps gulp-typescript typescript --save-dev non npm users copy this to your package.json file.
"devDependencies": {
  "gulp": "^4.0.0",
  "gulp-sourcemaps": "^2.6.4",
  "gulp-typescript": "^5.0.0",
  "typescript": "^3.2.2"
}
Now you have gulp and typescript installed. We will now create a gulpfile and write our code to minify the process of building the project. Follow the step below.
Create a gulpfile.js inside root directory and copy this code.
const gulp = require("gulp");
const ts = require("gulp-typescript");
const sourcemaps = require("gulp-sourcemaps");
const tsProject = ts.createProject("tsconfig.json", {
  typescript: require("typescript")
});

gulp.task("build", () => {
  gulp.src("process.yml")
    .pipe(gulp.dest("dist"));

  return tsProject.src()
    .pipe(sourcemaps.init())
    .pipe(tsProject())
    .js
    .pipe(sourcemaps.write())
    .pipe(gulp.dest("dist"));
});

gulp.task("watchTask", function () {
  gulp.watch("src/**/*.ts", ["build"]);
});

gulp.task("default", gulp.series("build"));
gulp.task("watch", gulp.series("build", "watchTask"));
Explanation
Line 1–3:- We are requiring our modules.
Line 4: We are using API of gulp-typescript and creating our TS project using tsconfig.json file which we will create later.
Line 8:- We are using Gulp API task and creating a task name build.
Line 9–10:- We are using Gulp API src and taking process.yml file as source(we will create it later) and piping it to our destination folder **dist.**Here
gulp.srccreates a readble stream and with the help of node streams we pipe it to a writable stream created bygulp.dest.Line 12–17:- We are copying our whole code as per tsconfig.json and converting it to Javascript and pasting it to dist folder.
Line 20–22:- We are creating another task watchTask for watching any changes in our build task.
Line 24–25:- We are finally using Gulp’s default API for runnig build task and watch API for watching changes to build and watch task.
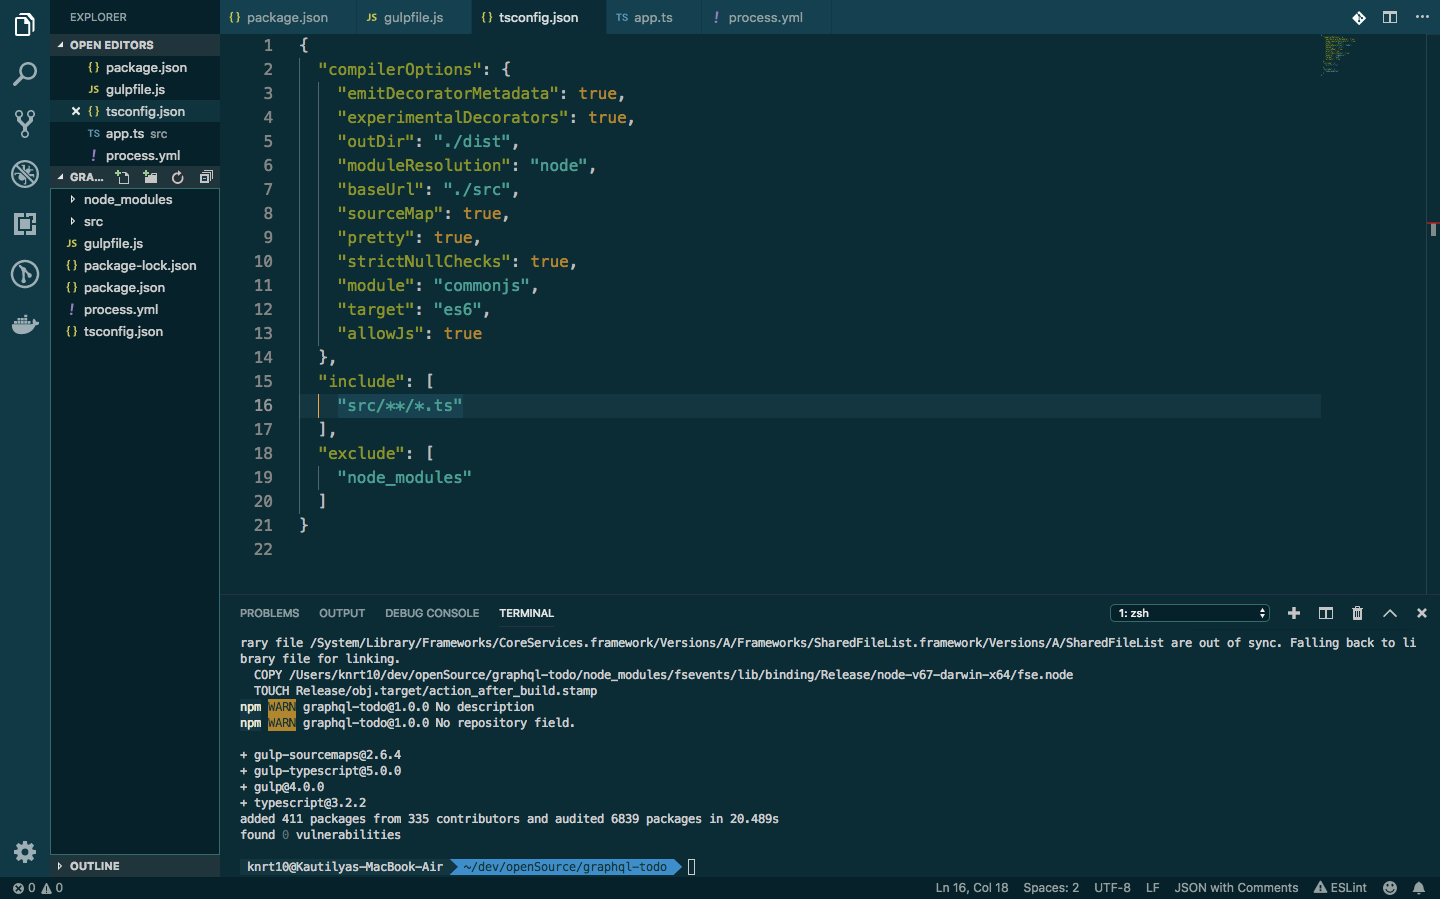
Create a tsconfig.json file in root directory and copy this code.
{
  "compilerOptions": {
    "emitDecoratorMetadata": true,
    "experimentalDecorators": true,
    "outDir": "./dist",
    "moduleResolution": "node",
    "baseUrl": "./src",
    "sourceMap": true,
    "pretty": true,
    "strictNullChecks": true,
    "module": "commonjs",
    "target": "es6",
    "allowJs": true
  },
  "include": [
    "src/**/*.ts"
  ],
  "exclude": [
    "node_modules"
  ]
}
Important:- Do notice baseUrl and outDir. baseUrl is where we will write our TS code and outDir is where gulp will compile and copy our code to JavaScript.
Now create a process.yml file in root directory and copy this code.
apps:
  - script    : 'app.js'
    name      : 'Backend To-do Application'
    node_args : '--inspect=0.0.0.0:5858'
We will learn why we are creating this file later on. After this create an empty directory src in our root folder. Up until now you might have project config like this. Those who are going to work only with docker, they will not have package-lock.json and node_modules.
 Project setup until now
To keep track of our work we will be using git. If not installed you can go through git to install it.
In your project initialize your repository as git repository by git init.
For working in developement version we will need nodemon and ts-node for reloading our server automatically when any change is made in our file and executing our TS file without building them respectively. We will use TSlint as our code linter. In your terminal inside project directory run this command.
npm i --quiet nodemon ts-node tslint tslint-eslint-rules --save-dev
"nodemon": "^1.18.9",
"ts-node": "^7.0.1",
"tslint": "^5.12.0",
"tslint-eslint-rules": "^5.4.0",
Create a tslint.json file inside root directory and copy the code given below.
{
  "defaultSeverity": "error",
  "extends": [
    "tslint:recommended",
    "tslint-eslint-rules"
  ],
  "jsRules": {},
  "rules": {
    "object-literal-shorthand": false,
    "object-literal-sort-keys": [
      false
    ],
    "ter-indent": [
      true,
      2
    ],
    "no-console": false,
    "only-arrow-functions": [
      false
    ],
    "member-access": false,
    "max-classes-per-file": [
      true,
      5
    ],
    "no-shadowed-variable": false,
    "interface-name": [
      false
    ],
    "max-line-length": [
      true,
      200
    ],
    "no-var-requires": false
  },
  "rulesDirectory": []
}
Inside scripts in package.json copy the following code.
"dev": "nodemon --no-deprecation --watch 'src/**/*.ts' --ignore 'src/**/*.spec.ts' --exec 'ts-node' src/app.ts",
"lint": "tslint -c tslint.json 'src/**/*.ts' --fix",
We will use npm run dev for running our code in development mode and npm run lint to lint our code. Now our actual coding will begin. Create a file inside src folder named as app.ts
Copy this inside src/app.ts
function testFunction(): string {
 return "Messi and Ronaldo are legends";
}

export default testFunction;
Now we will test this. Create a test folder inside src, and then create a file user-test-spec.ts. For testing we will install required modules. We will be using mocha for testing and chai for assertion. Run this command inside your project.
npm i --quiet chai chai-http chai-as-promised mocha mocha-typescript sinon --save-dev
non npm users copy this inside devDependencies.
"chai": "^4.2.0",
"chai-as-promised": "^7.1.1",
"chai-http": "3.0.0",
"mocha": "^5.2.0",
"mocha-typescript": "^1.1.17",
"sinon": "^7.2.2",
We will create a script for testing. Copy this code inside scripts
"test": "mocha --no-deprecation --timeout 10000 --require ts-node/register **/*.spec.ts"
We can use this command using npm test . So far our package.json will look like this.
{
  "name": "graphql-todo",
  "version": "1.0.0",
  "description": "This is a GraphQL API for todo application",
  "main": "index.js",
  "scripts": {
    "dev": "nodemon --no-deprecation --watch 'src/**/*.ts' --ignore         'src/**/*.spec.ts' --exec 'ts-node' src/app.ts",
    "lint": "tslint -c tslint.json 'src/**/*.ts' --fix",
    "start": "gulp && cd dist/ && node --inspect=8990 --no-deprecation app.js",
    "test": "mocha --no-deprecation --timeout 10000 --require ts-    node/register **/*.spec.ts"
  },
 "keywords": [],
 "author": "",
 "license": "ISC",
 "devDependencies": {
   "chai": "^4.2.0",
   "chai-as-promised": "^7.1.1",
   "chai-http": "3.0.0",
   "gulp": "^4.0.0",
   "gulp-sourcemaps": "^2.6.4",
   "gulp-typescript": "^5.0.0",
   "mocha": "^5.2.0",
   "mocha-typescript": "^1.1.17",
   "nodemon": "^1.18.9",
   "sinon": "^7.2.2",
   "ts-node": "^7.0.1",
   "tslint": "^5.12.0",
   "tslint-eslint-rules": "^5.4.0",
   "typescript": "^3.2.2"
  }
}
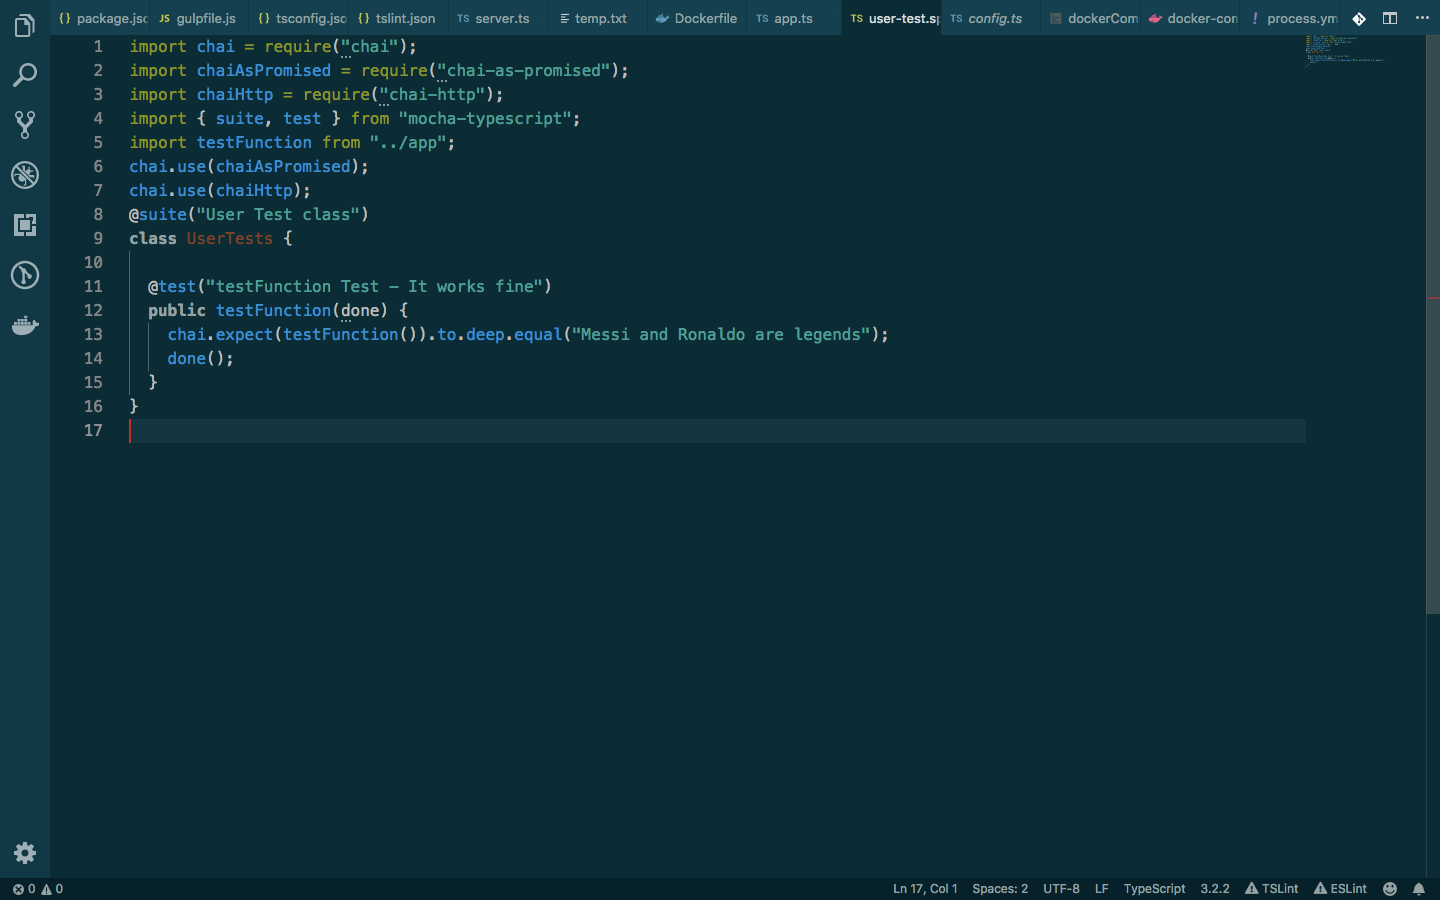
Inside your src/test/user-test.spec.ts copy this code
import chai = require("chai");
import chaiAsPromised = require("chai-as-promised");
import { suite, test } from "mocha-typescript";
import testFunction from "../app";
chai.use(chaiAsPromised);

@suite("User Test class")
class UserTests {

  @test("testFunction Test - It works fine")
  public testFunction(done) {
    chai.expect(testFunction()).to.deep.equal("Messi and Ronaldo are legends");
    done();
  }
}
Explanation:-
Line 1–4:- We are importing test modules and our file app.ts
Line 7–8:- We are defining suite to run and defining our class UserTests.
Line 10–16:-
@testwill declare the test message we are running, we also define a public test to run. We use chai.expect to test assetion of test.
Run your test by running npm test . If everything works fine, it will look like this.
To calculate test coverage of our code we will use nyc. We need to first check that our project is building or not. Copy this to scripts and then run npm run build
"build": "gulp"
You will get output as show below and a dist folder will be created.

Add nyc module by running npm i --quiet nyc --save-dev , non npm users copy this into package.json
"nyc": "^13.1.0"
Add the command given below to scripts.
"coverage": "nyc --reporter=text mocha --no-deprecation --timeout 10000 dist/test/*.spec.js -x dist/test/*.spec.js",
We need to build to latest code first, then after that we will run code coverage by running npm run build && npm run coverage. This will create a .nyc_output folder, from which our code coverage will be seen. You will see following output.
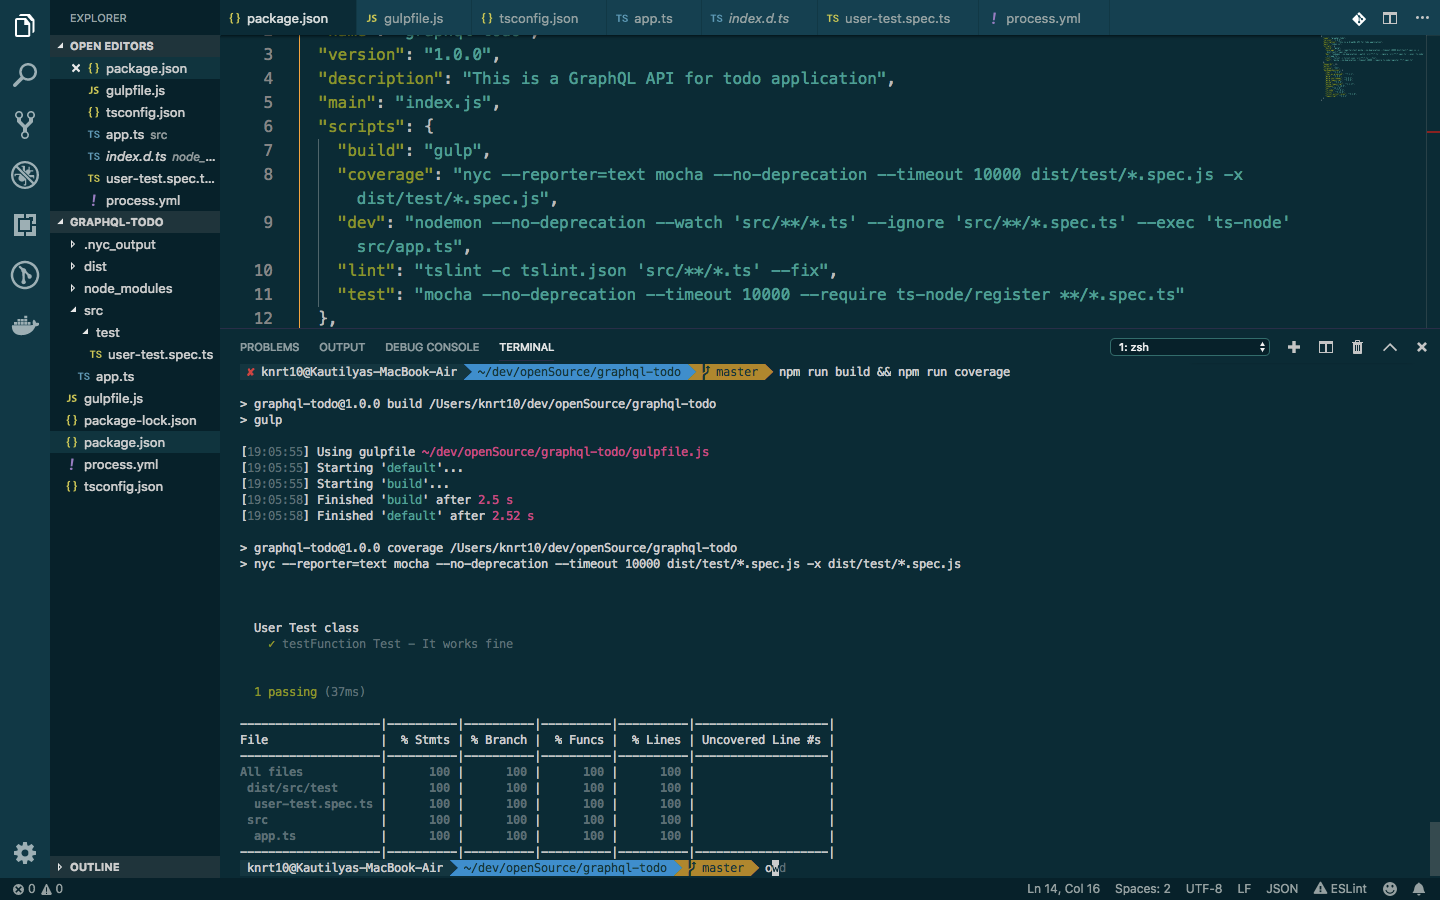
Above image shows that we have achieved 💯 code coverage which depicts that we have not written any unusable code.
Docker Setup
Now we will setup docker so that non npm users can also run tests and build project without installing node or npm. I assume that the readers have a basic understanding of docker. If you have never used docker before you might wanna check out this guide for getting started with Docker.
Create a Dockerfile inside root directory and copy this
FROM node:8

# Install gulp and pm2 globaly
RUN npm install --quiet -g gulp pm2

# Create app directory
RUN mkdir -p /usr/src/

WORKDIR /usr/src/

# Install app dependencies
COPY package.json /usr/src/

RUN npm install --quiet

# Bundle app source
COPY . /usr/src

# Build the project
RUN npm run build

WORKDIR /usr/src/dist

EXPOSE 4895
EXPOSE 5858
CMD ["pm2-docker", "process.yml"]
Explanation:-
Line 1:- We are use Node image having version 8.
Line 4:- We globally install gulp and pm2. PM2 is a Production Runtime and Process Manager for Node.js applications with a built-in Load Balancer.
Line 7:- We create a new directory
/usr/src/inside our docker image.Line 9:- We set
/usr/src/as our working directory inside the docker image.Line 12:- We copy
package.jsonfrom root directory to our working directory.Line 14:- We install node modules inside docker image.
Line 17:- We copy rest of our code from root directory to our working directory.
Line 20:- We build our project using gulp. We already installed gulp inside our docker image in line 4.
Line 22:- We set our working directory as
/usr/src/dist/as our JS code is compiled there.Line 26:- We execute
pm2and using ourprocess.ymlfile that we created earlier to start the application inside docker image.
We need to build docker image using this Dockerfile. Add a scripts folder inside root directory and create a dockerCompose.sh file inside it. Copy the following code inside scripts/dockerCompose.sh:
#!/usr/bin/env bash

cd ..

docker build -t knrt10/todoapi -f Dockerfile .

docker-compose up -d
Add this inside scripts in your package.json.
"dockerStart": "cd scripts && chmod 777 dockerCompose.sh && ./dockerCompose.sh && cd ..",
"dockerStop": "docker-compose down"
Now that you know how to create an image with a Dockerfile, let’s create an application as a service and connect it to a database. Then we can run some setup commands and be on our way to creating rest of application.
The Docker Compose file will define and run the containers based on a configuration file. We are using compose file version 2 syntax, and you can read about it on Docker’s site.
An important concept to understand is that Docker Compose spans buildtime and runtime. Up until now, we have been building images using docker build ., which is buildtime. This is when our containers are actually built. We can think of runtime as what happens once our containers are built and being used.
Compose triggers buildtime— instructing our images and containers to build — but it also populates data used at runtime, such as env vars and volumes. This is important to be clear on. For instance, when we add things like volumes and command, they will override the same things that may have been set up via the Dockerfile at buildtime.
Open your docker-compose.yml file in your editor in root directory and copy/paste the following lines:
version: '3'
services:
  web:
    build: .
    command: npm run dev
    volumes:
      - .:/usr/src/
      - /usr/src/node_modules
    ports:
      - "3000:3000"
    depends_on:
       - mongodb

  mongodb:
     image: mongo
     ports:
       - "27017:27017"
     volumes:
       - ./data:/data/db
Explanation:-
The first directive in the web service is to build the image based on our Dockerfile. This will recreate the image we used before, but it will now be named according to the project we are in, graphql-todo. After that, we are giving the service some specific instructions on how it should operate:
Line 5:- Once the image is built, and the container is running, the npm start command will start the application.
Line 6:-
volumes:– This section will mount paths between the host and the container.Line 7:-
.:/usr/src/– This will mount the root directory to our working directory in the container.Line 8:-
/usr/src/node_modules– This will mount the node_modules directory to the host machine using the buildtime directory.Line 9:-
ports:– This will publish the container’s port, in this case 3000, to the host as port 3000Line 11:- This depicts on what database image it depends on. We are using mongodb so we will specify mongodb
Line 14:- It will build mongodb image.
Line 15:- Same as nodejs we specify version of mongodb image here.
Line 17:-
ports:– This will publish the container’s port, in this case27017, to the host as port27017
Now before executing this script, check your docker is up and running. This command will execute our scripts/dockerCompose.sh file. This file builds our docker image. Now run npm run dockerStart
If everything goes right you will see this output. This means your docker image is created.
Successfully built 2597b7c50ed4
Successfully tagged graphql-todo_web:latest
Creating graphql-todo_mongodb_1 ... done
Creating graphql-todo_web_1     ... done
You can get information about your running containers using the command given below.
docker ps -a
You will see this kind of output

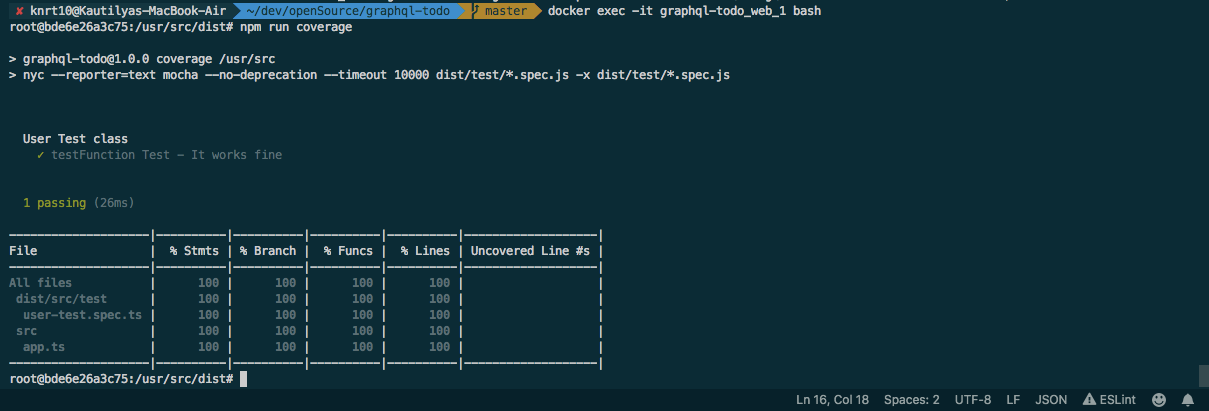
Copy the NAMES for image graphql-todo_web and run this
docker exec -it graphql-todo_web_1 -- /bin/bash
This will run bash inside the existing graphql-todo_web_1 container. The bash process will have the same Linux namespaces as the main container process. This allows you to explore the container from within and see how Node.js and your app see the system when running inside the container. The -it option is shorthand for two options:
-i, which makes sure STDIN is kept open. You need this for entering commands into the shell.
-t, which allocates a pseudo terminal (TTY).
Exploring container from within
Now you can run same commands as other users who have node installed. Find your test coverage by running the command given below.
npm run coverage
You will see the following output.
You can stop docker process by running npm run dockerStop after exiting from container.
Setting up Express server
We will now setup our express server. Copy this code to your package.json and run npm i --quiet. Non npm users just copy.
    "dependencies": {
      "@types/node": "^10.12.15",
      "bcrypt-nodejs": "0.0.3",
      "bluebird": "^3.5.3",
      "cors": "^2.8.5",
      "express": "^4.16.4",
      "helmet": "^3.15.0",
      "jsonwebtoken": "^8.4.0",
      "mongoose": "^5.4.0",
      "winston": "2.4.0"
    }
Explanation:-
bcrypt-nodejs:- Its for hashing user password using gensalt and securely storing into database
bluebird:- For handling promises.
cors:- For handling Cross origin resource sharing and enabling it across all headers and domains.
express:- For setting up server.
helmet:- For securing our Express apps by setting various HTTP headers.
jsonwebtoken:- For creating token that will authenticate the user.
mongoose:- An ORM(Object-Relational Mapping) to interact with mongoDB.
winston:- A cool logger instead of console.log.
Now create a server.ts inside src folder and copy this
"use strict";
/*
  Import modules
*/
import bluebird = require("bluebird");
import cors = require("cors");
import express = require("express");
import fs = require("fs");
import mongoose = require("mongoose");
import { Config } from "./shared";
global.Promise = bluebird;

/**
 * @exports TodoApp
 * @class
 * @method startServer
 * @method initEnv
 * @method initWinston
 * @method initExpress
 * @method initCORS
 * @method initAppRoutes
 * @method initServices
 */
export class TodoApp {
  public infoString: string;
  public port: any;
  private pkg = require("../package.json"); // information about package version
  private winston: any = require("winston"); // for logging
  private app: any; // express server
  constructor(private portGiven) {
    if (Config.dbSettings.authEnabled) {
      this.infoString = "mongodb://" + Config.dbSettings.username + ":" + Config.dbSettings.password + "@"
        + Config.dbSettings.connectionString + "/" + Config.dbSettings.database;
    } else if (Config.dbSettings.localDatabase) {
      this.infoString = "mongodb://" + Config.dbSettings.connectionString + "/" + Config.dbSettings.database;
    } else {
      this.infoString = "mongodb://" + Config.dbSettings.dockerconnectionString + "/" + Config.dbSettings.database;
    }
    this.port = portGiven;
  }

  /**
   * This starts express server
   * @method startServer @public
   */
  public startServer() {
    this.initEnv().then(() => {
      // logs/ Folder already
      // Initilatizing the winston as per documentation
      this.initWinston();

      this.initServices().then(() => {

        // start the express server(s)
        this.initExpress();

        // all done
        this.winston.info(this.pkg.name + " startup sequence completed", {
          version: this.pkg.version,
        });
      });
    });
  }

  /**
   * This setups the log folder and any other environment needs
   * @method initEnv @private
   * @returns {Promise<void>}
   */
  private initEnv(): Promise<void> {
    return new Promise<void>((resolve) => {
      const logPath: string = Config.serviceSettings.logsDir;
      fs.stat(logPath, (err) => {
        resolve();
      });
    });
  }

  /**
   * This Initilatizes the winston
   * @method initWinston @private
   */
  private initWinston() {
    // winston is configured as a private variable to the main app.ts
    // it can then be spread to child modules or routeModules. This way only one winston object needs to be setup
    this.winston.remove(this.winston.transports.Console);
    this.winston.add(this.winston.transports.Console, {
      colorize: true,
      prettyPrint: true,
      timestamp: true,
    });

    this.winston.add(this.winston.transports.File, {
      name: "error",
      level: "error",
      filename: "logs/error.log",
      maxsize: 10485760,
      maxFiles: "10",
      timestamp: true,
    });
    this.winston.add(this.winston.transports.File, {
      name: "warn",
      level: "warn",
      filename: "logs/warn.log",
      maxsize: 10485760,
      maxFiles: "10",
      timestamp: true,
    });
    this.winston.add(this.winston.transports.File, {
      name: "info",
      level: "info",
      filename: "logs/info.log",
      maxsize: 10485760,
      maxFiles: "10",
      timestamp: true,
    });
    this.winston.add(this.winston.transports.File, {
      name: "verbose",
      level: "verbose",
      filename: "logs/verbose.log",
      maxsize: 10485760,
      maxFiles: "10",
      timestamp: true,
    });

    this.winston.info("Winston has been init");
  }

  /**
   * This Initilatizes express server
   * @method initExpress @private
   */
  private initExpress() {
    // create express
    this.app = express();
    this.initCORS();

    // add in any routes you might want
    this.initAppRoutes();

    // and start!
    this.app.listen(this.port);
    this.winston.info("Express started on (http://localhost:" + this.port + "/)");
  }

  /**
   * This Initilatizes cors package
   * @method initCORS @private
   */
  private initCORS() {
    this.app.use(cors());
  }

  /**
   * This Initilatizes routes for server
   * @method initAppRoutes @private
   */
  private initAppRoutes() {
    // We will setup our graphql route here
  }

  /**
   * This Initilatizes services we want if expanding the application
   * @method initServices @private
   * @returns {Promise<boolean>}
   */
  private initServices(): Promise<boolean> {
    return new Promise<boolean>((resolve, reject) => {
      // connect to mongodb
      mongoose.connect(this.infoString, { useNewUrlParser: true }).then(() => {
        this.winston.info("Mongo Connected!");
        resolve(true);
      });
    });
  }
}
Explanation:-
Line 1–10:- We import necessary modules.
Line 11:- We specify that our promises globally will be handled by
bluebird.Line 24-30:- We create a class TodoApp and initialize it’s constructor with a public data member infostring and set it to according to what type of mongoDB we are using. If running locally
authEnabledis set tofalseinconfig.tsfile. If running docker localDatabase insideconfig.tsis set tofalse.Line 46 :- We create a public member function to start the express server.
Line 70–77:- Here we check whether we have a logs folder or not. We are returning a promise here that we handle in line 47.
Line 83–127:- We are using winston as our logger. So here we setup winston that’s all.
Line 133–144:- We create a member function to initialize our express application.
Line 150–152:- We are intializing cors module in this member function.
Line 158–160:- In this member function we will initialize our graphQL routes in our next article.
Line 167–175:- In this member function we are returing a promise that resolves to that a mongoDB is connected. We handle this promise on line 52.
Now create a shared folder inside src/ and create 2 files
config.ts
index.ts
Copy this to src/shared/config.ts
/**
 * This file stores info for api, db, keys, logs
 * @constant Config
 */
export const Config = {
  apiSettings: {
    host: process.env.API_HOST || "localhost",
  },
  dbSettings: {
    authEnabled: process.env.MONGO_AUTH || false,
    localDatabase: true,
    dockerconnectionString: process.env.MONGO_DB_HOST_DOCKER || "mongodb:27017",
    connectionString: process.env.MONGO_DB_HOST || "localhost:27017",
    database: process.env.DATABASE || "todoapp",
    password: process.env.MONGO_AUTH_PASSWORD,
    username: process.env.MONGO_AUTH_USERNAME,
  },
  serviceSettings: {
    logsDir: "logs/",
    env: process.env.environment || "local",
  },
  secretKeys: {
    jwtSecret: process.env.SECRET || "yes1234$ASDASD/SA",
    cryptoSecret: process.env.CRYPTO || "DASD2233312S;!`W21",
  },
};
And this inside src/shared/index.ts
export * from "./config";
Now copy this to your src/app.ts
"use strict";

import { TodoApp } from "./server";

const server: TodoApp = new TodoApp(process.env.API_PORT || 3000);

// starting the server*

server.startServer();
Also create a logs folder inside project root directory and create a temp.txt file inside it. Copy the following code inside logs/temp.txt :
This is just an example of log file
{"level":"info","message":"Winston has been init","timestamp":"2018-12-26T16:59:05.380Z"}
{"level":"info","message":"Mongo Connected!","timestamp":"2018-12-26T16:59:05.420Z"}
{"level":"info","message":"Express started on ([http://localhost:3000/](http://localhost:3000/))","timestamp":"2018-12-26T16:59:05.430Z"}
{"version":"1.0.0","level":"info","message":"graphql-todo startup sequence completed","timestamp":"2018-12-26T16:59:05.432Z"}
To update our tests. Copy this to src/test/user-test.spec.ts :
import chai = require("chai");
import chaiAsPromised = require("chai-as-promised");
import chaiHttp = require("chai-http");
import { suite, test } from "mocha-typescript";
import sinon = require("sinon");
import { TodoApp } from "../server";
import { Config } from "../shared";

// starting the server
const server: TodoApp = new TodoApp(process.env.API_PORT || 3001);
server.startServer();

chai.use(chaiAsPromised);
chai.use(chaiHttp);

@suite("User Test class")
class UserTests {

  static after() {
    process.exit(0);
  }

  @test("Testing Local Connection - try connection for Local mongodb")
  public localDb(done) {
    setTimeout(() => {
      Config.dbSettings.localDatabase = true;
      const mock = sinon.mock(new TodoApp(process.env.API_PORT || 3001), "constructor");
      chai.expect(mock.object.infoString).to.deep.equal("mongodb://" + Config.dbSettings.connectionString + "/" + Config.dbSettings.database);
      done();
    }, 100);
  }

  @test("Testing Docker Connection - try connection for docker mongodb")
  public dockerDb(done) {
    Config.dbSettings.localDatabase = false;
    const mock = sinon.mock(new TodoApp(process.env.API_PORT || 3001), "constructor");
    chai.expect(mock.object.infoString).to.deep.equal("mongodb://" + Config.dbSettings.dockerconnectionString + "/" + Config.dbSettings.database);
    done();
  }

  @test("Testing Online Connection - try connection for online mongodb")
  public OnlineDb(done) {
    Config.dbSettings.authEnabled = true;
    const mock = sinon.mock(new TodoApp(process.env.API_PORT || 3001), "constructor");
    chai.expect(mock.object.infoString).to.deep.equal("mongodb://" + Config.dbSettings.username + ":" + Config.dbSettings.password + "@"
        + Config.dbSettings.connectionString + "/" + Config.dbSettings.database);
    done();
  }
}
First start your mongoDB for your OS and then run npm run build && npm run coverage. You will see the output given below.
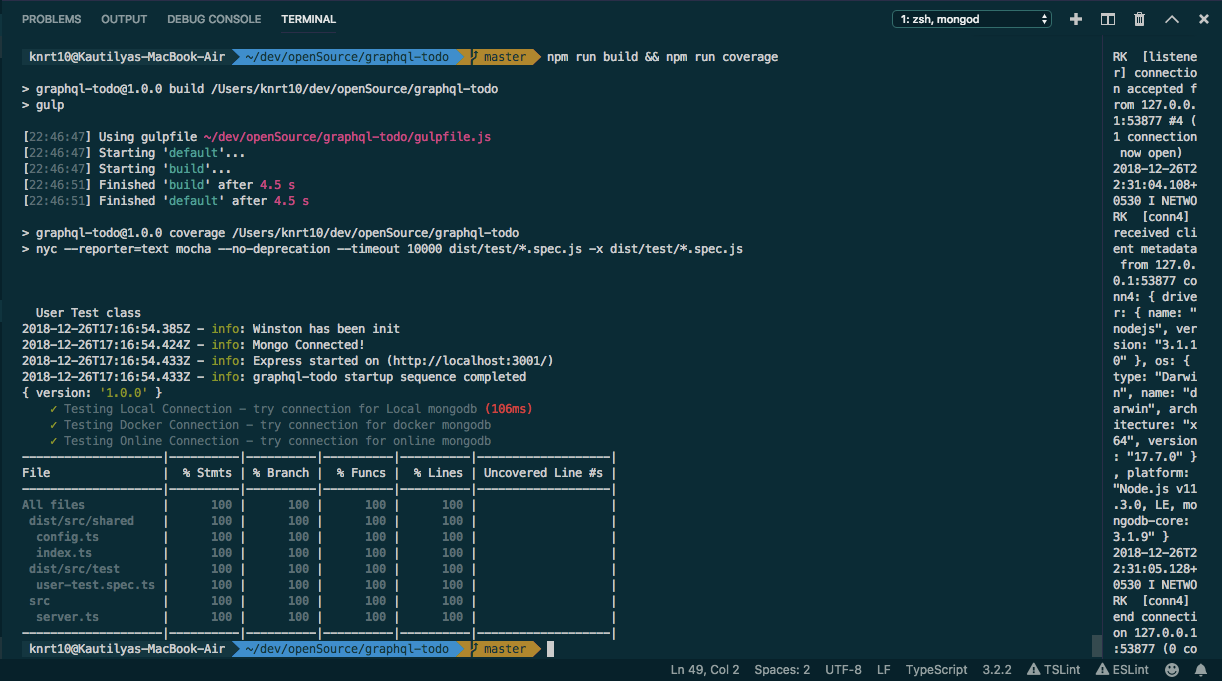
second set of tests with maintained 💯 code coverage. 👌
Commiting our changes
We need to commit our changes, so that if some problem occur we can roll back to this commit. First create a .gitignore file in your root directory and copy this
*# Dependency directories*

node_modules
jspm_packages

*# Optional npm cache directory
*.npm

*# Optional REPL history
*.node_repl_history
/bin/
/tmp/
/dist/
/typings/
/data/
/logs/*.log
/.nyc_output/
/coverage/
.DS_Store
package-lock.json
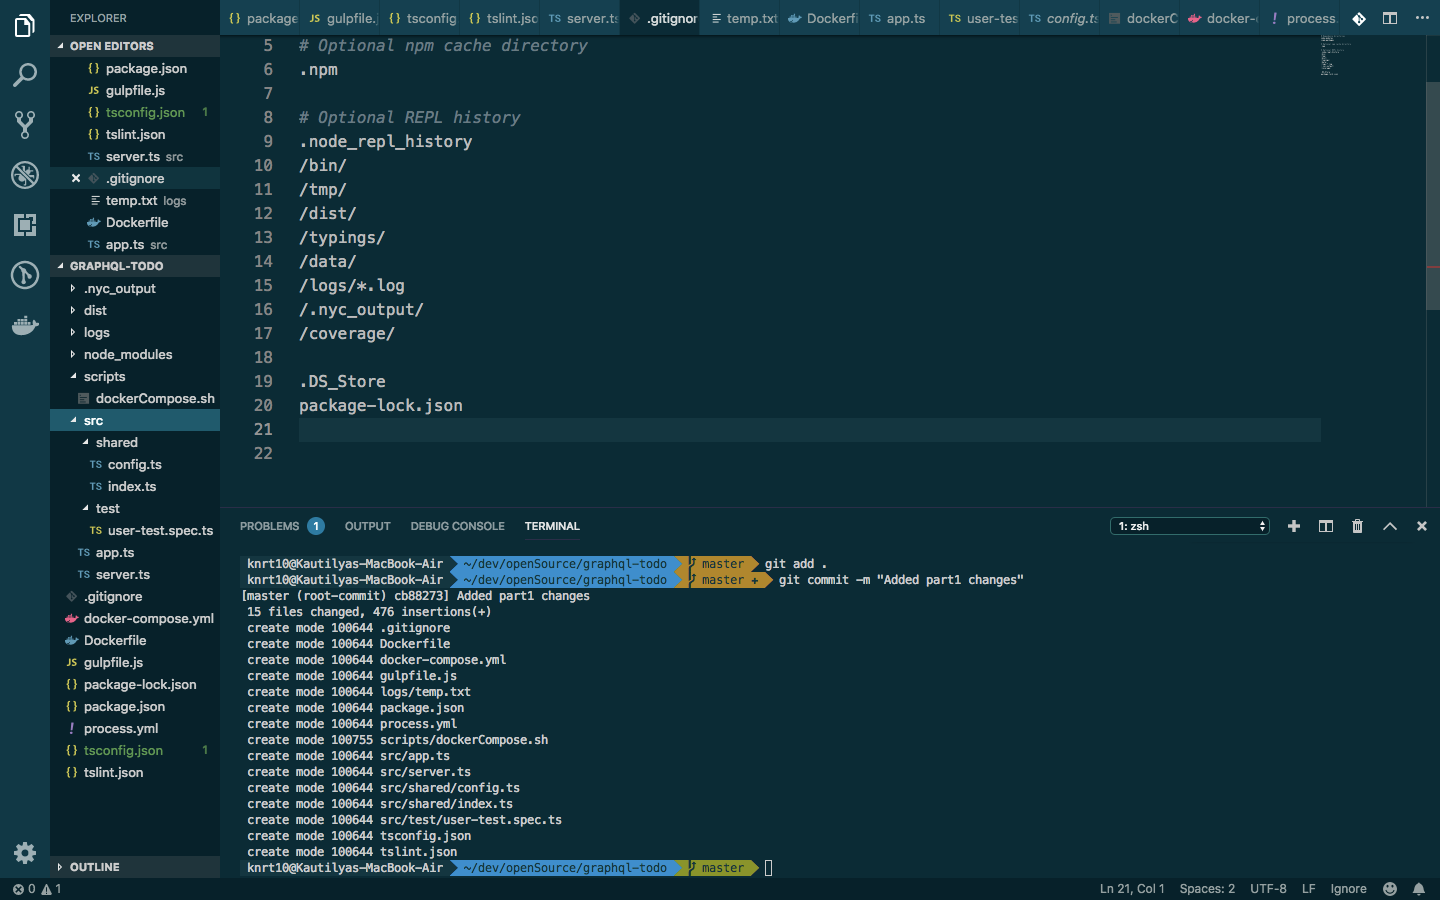
Now copy and run the commands given below inside your git repository. Make sure you are in root folder.
git add .
git commit -m "Adding part1 changes"
So far your project should look like this
Conclusion
That is for this part. In this part you learnt following things:-
How to create express server.
How to setup docker using dockerfile and docker-compose.yml.
How to use Gulp and compile code from TS to JS.
How to write clean code.
How and write tests and have 💯 code coverage 😃.
In next part you will start working with graphQL and make API using that.
Did you find this page helpful? Consider sharing it 🙌
Kautilya Tripathi
Software Engineer 2
Certified Kubernetes Security Specialist (CKS) | Certified Kubernetes Administrator (CKA) | Distributed Systems | Systems Programming | OSS ❤️